Shineyrock
blog
-
like 2
How to Create a Custom WordPress Plugin From Scratch
Every WordPress site needs a theme to pull content from the database and display that in a design. And theoretically you could run a site with just a theme and nothing else. But that site would be very limited without the addition of plugins.
Plugins add extra functionality to your WordPress site over and above what comes with WordPress core. Everything from a booking calendar or animated slider to a full-featured learning management system or online marketplace—you can add them all to your site with plugins.
In this guide, I’ll show you how to create your own WordPress plugin. I’ll show you how to use best practice in plugin development, how to get the code in your plugin to run, and how to structure your plugin’s code and files. I’ll also walk you through the process of creating your first plugin and answer some FAQs.
Free and Paid WordPress Plugins
If you want to add some specific features to your website, there are plenty of places you can buy or download plugins. The WordPress plugin directory includes thousands of free plugins that’ll help you create the site you need. But if you’re looking for more advanced features, a better user interface, or improved support, it’s worth buying premium plugins from authors on CodeCanyon.
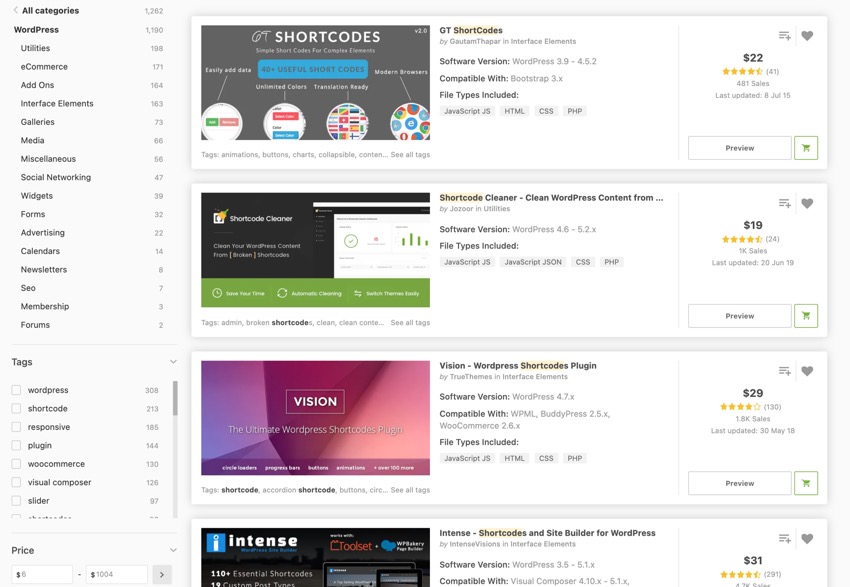
But sometimes you might need to code your own plugin! This can be more efficient than using a third-party plugin, as you might only need a part of the code provided by those. It also means you can develop a plugin that meets your needs more precisely, or you can customise an existing plugin to adapt it for your site.
What Do You Need to Make a Plugin?
To build your own plugin and run it on your WordPress site, you’ll need:
- a code editor
- a development WordPress installation with a copy of your live site for testing
Don't test your plugin on your live site until you know it works!
If you don’t already have a local WordPress installation, follow our guide to copying your site to a local install. Or if you can’t install WordPress locally, use a duplicate of your site on a testing installation on your server. Find out how to copy your site.
 WordPressHow to Set Up a Killer WordPress Testing Environment Locally
 WordPressHow to Migrate a WordPress Site
Types of WordPress Plugin
Plugins can carry out lots of tasks. What they all have in common is that they add extra functionality to your site. Types of WordPress plugin include:
- site maintenance plugins for things like security, performance, or backups
- marketing and sales plugins for things like SEO, social media, or eCommerce
- content plugins such as custom post types, widgets, shortcodes, forms, galleries, and video feeds
- API plugins that work with the WordPress REST API or pull in external content from services like Google Maps
- community plugins that add social networking features
… and lots more! For an idea of what plugins can do, check out the WordPress plugin directory and the CodeCanyon marketplace.

What Goes Into a Plugin?
Before you get started building your plugin, it’s worth knowing what goes into a plugin. Exactly what the plugin code will look like will depend on your plugin: some are small, with just one plugin file, while others are massive, with multiple include files, scripts, stylesheets, and template files. And there are plenty that fall somewhere in the middle.
The elements you’ll probably have in your plugin are:
- the main plugin file (this is essential)
- folders for different file types
- scripts
- stylesheets
- include files to organise the code
Let’s have a look at each of these.
The Main Plugin File
The main plugin file is essential. It will always be a PHP file, and it will always contain commented-out text that tells WordPress about your plugin.
Here’s an example, from the Akismet plugin:
<?php

/**

 * @package Akismet

 */

/*

Plugin Name: Akismet Anti-Spam

Plugin URI: https://akismet.com/

Description: Used by millions, Akismet is quite possibly the best way in the world to <strong>protect your blog from spam</strong>. It keeps your site protected even while you sleep. To get started: activate the Akismet plugin and then go to your Akismet Settings page to set up your API key.

Version: 4.1.7

Author: Automattic

Author URI: https://automattic.com/wordpress-plugins/

License: GPLv2 or later

Text Domain: akismet

*/
This tells WordPress what your plugin does, where to find out more about it, and who developed it. It also gives information about the version number and the text domain and path for internationalisation, as well as the license.
WordPress takes this information and uses it to populate the plugins screen in your site. Here’s how Akismet looks on that screen:

You can see that the information provided in the plugin file is used to populate this entry and provide links.
Other information about the plugin is contained in the README.txt file, which is used to populate the plugin's page in the plugin directory:

The main plugin file will also contain the code that makes the plugin run. Sometimes that will be all the PHP for the plugin, but for larger plugins, there’ll be calls to include files containing extra code. This helps you organise your code and means you don’t have one long, disorganised file that’s difficult to work with. I’ll show you how to use include files later in this guide.
Folder Structure
While there are no hard and fast rules on how you organise the folders in your plugin, it makes sense to adopt the same structure that other plugin developers use. This will familiarise you with the way other plugins are built and mean that if you share your code in future, it will make sense to other people.
Folders in your plugin might include:
- css or styles for stylesheets
- scripts for JavaScript
- includes for include files
- templates for template files that your plugin outputs
- assets for media and other asset files
- i18n for internationalisation files
You might find you need to use more folders if your plugin is large or complex. For example, WooCommerce has folders for packages, sample data, and more. These in turn include subfolders for things like blocks and admin files.

Scripts and Stylesheets
If your plugin outputs content that needs styling, either in the front-end or in the admin screens, you may need stylesheets. And if your plugin will use scripts, you’ll need files for these.
It makes sense to keep these in their own folder, even if you only have one of each. You’ll need to enqueue these scripts and stylesheets using a dedicated function in your main plugin file. I’ll show you how to do this when we’re building the plugin.
Include Files
If your plugin needs organisation, you can do this by splitting your code into multiple files, called include files. You then put these files into their own folder and call them in your main plugin file using an
includeorrequirefunction.This way, you can keep the bulk of your code in a well-organised file structure while your main plugin file remains lean and minimal.
If your plugin isn’t all that big, you don’t need to use include files: just add your code to the main plugin file. But you might find you need to organise this file and reorder functions within it as you add them, to maintain a logical structure.
These are the most common elements of a plugin. We’ve seen in the WooCommerce example that there can be many more. Or in smaller plugins there can be many fewer. But as you develop more plugins, you’ll find yourself using these elements more and more.
How to Run Your Plugin Code: Options
When you add code to your plugin, it won’t do anything until you activate it in some way. There are a few methods you can use to activate your code or pull in code from WordPress:
- functions
- action and filter hooks
- classes
Let’s take a look at each of these.
Functions
Functions are the building blocks of WordPress code. They’re the easiest way to get started writing your own plugins and the quickest to code. You’ll find plenty of them in your themes' files too.
Each function will have its own name, followed by braces and the code inside those braces.
The code inside your plugin won’t run unless you call the function somehow. The simplest (but least flexible) way to do that is by directly calling the code in your theme or somewhere else in your plugin.
Here’s an example function:
tutsplus_myfunction {

// code goes here

}
To directly call that function in your theme, you’d simply type
tutsplus_myfunction()in the place in your theme template files where you want it to run. Or you might add it somewhere in your plugin... but you’d also need to activate the code that calls it!There are a few limitations to this:
- If the function does something that isn’t just adding content somewhere in a theme template file, you can’t activate it this way.
- If you want to call the function in multiple places, you’ll have to call it again and again.
- It can be hard to keep track of all the places you’ve manually called a function.
It’s much better practice to call functions by attaching them to a hook.
Action and Filter Hooks
By attaching your function to a hook, you run its code whenever that hook is fired. There are two types of hook: action hooks and filter hooks.
Action hooks are empty. When WordPress comes to them, it does nothing unless a function has been hooked to that hook.
Filter hooks contain code that will run unless there is a function hooked to that hook. If there is a function, it’ll run the code in that function instead. This means you can add default code to your plugin but override it in another plugin, or you can write a function that overrides the default code that’s attached to a filter hook in WordPress itself.
Hooks are fired in three ways:
- By WordPress itself. The WordPress core code includes hundreds of hooks that fire at different times. Which one you hook your function to will depend on what your function does and when you want its code to run. You can find a list of WordPress hooks in the developer handbook.
- By your theme. Many themes include action and filter hooks that you can use to add extra content in key places in your website’s design. And all themes will include a
wp_headandwp_footerhook. Combine these with conditional tags, and you can run specific code on certain types of pages in your site. - By your plugin or other plugins. You might add an action hook to your plugin and then add functions in your include files that attach code to that hook. Or you might write a filter hook and then have a function that overrides its contents under certain circumstances. Alternatively, if you’re creating a plugin to complement another plugin, you can hook your functions to the existing hook in the third-party plugin. I’ve done this with WooCommerce, for example, to customise what’s output on product pages.
Some of this is more advanced, but with your first plugin, you’ll probably be hooking your functions to an action or filter hook output by WordPress itself, most likely an action hook.
Classes
Classes are a way of coding more complex features, such as widgets and customizer elements, that make use of the existing WordPress APIs.
When you write a class in your plugin, you’ll probably be extending an existing class that’s coded into WordPress. This way, you can make use of the code provided by the class and tweak it to make it your own. An example would be the customizer, where you might write a class including a color picker, making use of the color picker UI that’s provided in the existing class for the customizer.
Using classes is more advanced than functions, and it’s unlikely you’ll do it in your first plugin. To find out more, see our guide to classes in WordPress.
If you do write classes, you’ll still have to use actions or filters to get them to run.
Plugin Best Practices
Before you start coding your plugin, it helps to understand best practices for plugins so your code can be high quality right from the start.
These include:
- Write your code according to WordPress coding standards. If you want to submit your plugin to the plugin directory, you’ll have to do this.
- Use comments throughout your code so other people can work with it—and so you remember how your code works when you come back to it in the future.
- Name your functions, hooks, and classes using prefixes so they are unique to your plugin. You don’t want to give a function the same name as another function in a different plugin or in WordPress core.
- Organise your folders logically, and keep your code separated so other people can understand it and so you can add to it over time without it becoming a mess.
You might think that using best practice isn’t necessary because it’s just you working with the plugin. But your plugin might grow over time, you might let other people use it, or you might sell it. Or you might come back to it in two years and not be able to remember how the code is organised!
Creating Your First Plugin in 4 Steps
At last! You have a grounding in how plugins work, and it’s time to roll your sleeves up and create your first plugin. I’m going to take you through the process of creating a simple plugin that registers a custom post type.
This is a very common use of a plugin, and something you might then build on over time to add custom template files for your custom post type or other functionality.
I’ll show you the basic code for the plugin and give you an introduction to how you might add to it over time.
1. Create the Plugin Folder and File
Even if your plugin is starting out small with just one file, it’s good practice to give it its own folder. Start by creating a folder in your wp-content/plugins directory. Inside that, create a PHP file for your plugin.
Give them both a name that makes sense and includes a prefix. I’m calling my folder tutsplus-register-post-types and my file tutsplus-register-post-types.php.
Now open your plugin file and add the commented-out information at the top. You can take mine below and edit it to reflect the fact that this is your plugin, not mine.
<?php

/*

Plugin Name: Tuts+ Register Post Types

Plugin URI: https://tutsplus.com/

Description: Plugin to accompany tutsplus guide to creating plugins, registers a post type.

Version: 1.0

Author: Rachel McCollin

Author URI: https://rachelmccollin.com/

License: GPLv2 or later

Text Domain: tutsplus

*/
Now, if you save your file and go to the Plugins screen in your development site, you’ll see the plugin on the screen:

You can activate it if you want, but it won’t do anything yet because you haven’t added any code to it. Let’s do that.
2. Add Functions
Now it’s time to write the first function in our plugin. Start by making your plugin and adding the braces which will contain the code. Here’s mine:
function tutsplus_register_post_type() {

    // movies

    $labels = array(

        'name' => __( 'Movies' , 'tutsplus' ),

        'singular_name' => __( 'Movie' , 'tutsplus' ),

        'add_new' => __( 'New Movie' , 'tutsplus' ),

        'add_new_item' => __( 'Add New Movie' , 'tutsplus' ),

        'edit_item' => __( 'Edit Movie' , 'tutsplus' ),

        'new_item' => __( 'New Movie' , 'tutsplus' ),

        'view_item' => __( 'View Movie' , 'tutsplus' ),

        'search_items' => __( 'Search Movies' , 'tutsplus' ),

        'not_found' =>  __( 'No Movies Found' , 'tutsplus' ),

        'not_found_in_trash' => __( 'No Movies found in Trash' , 'tutsplus' ),

    );

    $args = array(

        'labels' => $labels,

        'has_archive' => true,

        'public' => true,

        'hierarchical' => false,

        'supports' => array(

            'title',

            'editor',

            'excerpt',

            'custom-fields',

            'thumbnail',

            'page-attributes'

        ),

        'rewrite'   => array( 'slug' => 'movies' ),

        'show_in_rest' => true

    );

}
This includes all the labels and arguments for your post type and (crucially) the
register_post_type()function which is provided by WordPress.I’ve used movies as my post type here as I’m creating an imaginary movie review site. You might want to use something different.
Now, if you save your file and go back to your site, you’ll see that nothing has changed. That’s because you haven’t activated your code. The method we use to activate the function here is by hooking it to an action hook provided by WordPress, the
inithook. When you use a function provided by WordPress (such asregister_post_type), you’ll find that there’s a hook that you should use. You can find details in the WordPress handbook entry for registering custom post types.So let’s add the hook. Under your code, and outside the braces, add this line:
add_action( 'init', 'tutsplus_register_post_type' );
We use the
add_action()function to hook our code to an action hook, with two parameters: the name of the action hook and the name of our function.Now try saving your files and going back to your site. You’ll see that the custom post type has been added to your admin menu (assuming you’ve activated the plugin).

Nice!
Now let’s add an extra function, to register a custom taxonomy. Below the code you’ve written so far, add this:
function tutsplus_register_taxonomy() {

    // books
    $labels = array(
        'name' => __( 'Genres' , 'tutsplus' ),
        'singular_name' => __( 'Genre', 'tutsplus' ),
        'search_items' => __( 'Search Genres' , 'tutsplus' ),
        'all_items' => __( 'All Genres' , 'tutsplus' ),
        'edit_item' => __( 'Edit Genre' , 'tutsplus' ),
        'update_item' => __( 'Update Genres' , 'tutsplus' ),
        'add_new_item' => __( 'Add New Genre' , 'tutsplus' ),
        'new_item_name' => __( 'New Genre Name' , 'tutsplus' ),
        'menu_name' => __( 'Genres' , 'tutsplus' ),
    );

    $args = array(
        'labels' => $labels,
        'hierarchical' => true,
        'sort' => true,
        'args' => array( 'orderby' => 'term_order' ),
        'rewrite' => array( 'slug' => 'genres' ),
        'show_admin_column' => true,
        'show_in_rest' => true

    );

    register_taxonomy( 'tutsplus_genre', array( 'tutsplus_movie' ), $args);

}
add_action( 'init', 'tutsplus_register_taxonomy' );
Again, you might want to change the name of your custom taxonomy. Here, I’ve made the taxonomy apply to the post type I’ve just registered (the third parameter of the
register_taxonomyfunction). If you gave your post type a different name, make sure to edit that bit.Now save your file and take a look at your admin screens. When you hover over your post type in the admin menu, you’ll see the new taxonomy.

You now have a working plugin. Well done!
Let’s take a look at how you might add to it.
3. Enqueue Stylesheets and Scripts
If you need to use custom styling or scripts in your plugin, you could add them right into your plugin file—but that’s not best practice. Instead, you should create stylesheets and scripts as separate files in your plugin folder and enqueue those, using a function provided by WordPress.
Let’s imagine you want to add styling for your custom post type. You could add this to your theme, but you might want to add some specific styling to the plugin to make the post type stand out from other post types in any theme.
To do this, you create a new folder inside your plugin folder called css (or styles, it’s up to you). Inside that folder, create a stylesheet called style.css, or you can give it a more specific name for clarity. I’m going to call mine movies.css.
You then need to enqueue that file in your plugin so that it can be used by WordPress. Add this to your main plugin file, above the functions you already have. I like to add enqueuing and includes first in my plugin file so I can see what other files are being activated.
function tutsplus_movie_styles() {
    wp_enqueue_style( 'movies',  plugin_dir_url( __FILE__ ) . ‘/css/movies.css’ );
}
add_action( 'wp_enqueue_scripts', ‘tutsplus_movie_styles' );
If you save your file, you won’t see any difference in your admin screens—but if you’ve added posts of the custom post type and your stylesheet includes styling for them, you’ll now see that in the front-end of your site.
Note that the hook used for enqueuing both stylesheets and scripts is the same: they both use
wp_enqueue_scripts. There isn’t a separate hook for styles.Enqueuing scripts works in a very similar way. Follow these steps:
- Add a scripts or js folder to your plugin folder.
- Save your script files in that folder.
- Enqueue the script in the same way as the stylesheet above, replacing the
wp_enqueue_style()function withwp_enqueue_script().
4. Using Include Files
Another option as you develop your plugin is to create extra PHP files, known as include files. If you have a lot of these, you might create multiple folders for different types of include file, or you might just create one folder called includes.
There are a few functions you can use to include files, which you’ll find in our comprehensive guide to including and requiring files.
For example, in our custom post type plugin, we might create some code to vary the way the content of the page is output, using the
the_contentfilter hook to amend the code being run each time the content is output on a product page.Instead of adding this code to the main plugin file, you could add it to a separate file called movie-content.php and then write the code in that file for the way the content is output for movies.
To include this file in your plugin, you add a folder called includes to your plugin, and then inside that folder you add the content-movie.php file.
To include that file in your plugin, you add this code at the beginning for the main plugin file:
include( plugin_dir_path( __FILE__ ) . ‘includes/movie-content.php' );
You don’t need to hook this to an action or filter hook—just use the
include_once()function in your plugin file. That will then call the code from the include file as if it was in your main plugin file at that point.How to Extend or Edit an Existing Plugin
Sometimes you might find a plugin in the plugin directory or from a plugin vendor that does most of what you need a plugin to do, but not quite all. Or you might be running a plugin and want to make some tweaks and customisations.
The fact that WordPress is open source makes this possible. You can take another plugin’s code and extend or edit it to make it work the way you want it to.
There are two ways to do this:
- Take an existing plugin and fork it—i.e. edit it so it works differently, is more reliable, or has extra features.
- Write your own plugin that extends the original plugin.
Taking an existing plugin and editing it is fairly straightforward: you make your own copy on a development site (never live!) and make edits to it as needed. Make sure you use version control to track your changes in case something goes wrong.
Extending a plugin by writing your own plugin is slightly more complicated, and won’t work with every plugin, but is a more robust way of doing things in my opinion.
Many of the most popular plugins will make extensive use of hooks and classes in their code. You can hook into action and filter hooks and extend classes to write your own code, which uses the existing plugin’s code as a base but then adds to or edits it.
For example, WooCommerce has so many functions, hooks, and classes that it has its own API and developer documentation. Each part of the WooCommerce system is powered by one or more of these functions, hooks, or classes. To make changes, you need to identify which code is driving the part of the system you want to change, and then write your own plugin which either attaches to the same hook(s) or extends the classes.
You’ll find you can create significant customisations to a plugin like WooCommerce in this way: I once used it to power a listings site that didn’t even include a checkout. I used hooks to remove all the elements I didn’t want and add new ones.
For some examples of how you can hook into WooCommerce and extend or edit it with your own plugin, see our guide to adding product descriptions to archive pages and to adding a product-based blog to your store. These examples just scratch the surface of what you can achieve, but they'll give you an idea of how to start.
 WordPressWooCommerce: Adding the Product Short Description to Archive Pages
 WordPressCreate a Blog for Each Category or Department in Your WooCommerce Store
Taking It Further: Plugin Features
In this guide, I’ve shown you how plugins are coded and how to get started building a simple plugin.
Once you’ve got the hang of plugin development, you can build more complex and full-featured plugins to carry out more complex tasks on your site.
Let’s take a look at some examples.
Widget Plugins
Widget plugins involve working with classes but are a good introduction to the topic. Our guide to creating a widget plugin will help you do it.
You can also find plenty of widget plugins on CodeCanyon, which will save you coding them yourself. On our blog, we’ve identified the best widget plugins for 2021, the best Facebook widgets, and the best Twitter widgets.

Shortcode Plugins
Creating a shortcode is a great place to start creating plugins as they’re relatively simple and very useful. Find out how to create them with our guide to coding shortcodes in WordPress.
CodeCanyon also has a bunch of useful shortcode plugins you can use to add extra functionality to your site.

Social Media Plugins
Social media plugins are incredibly popular as they let you display your Facebook, Twitter, or Instagram feed on your site and let your visitors share your content via their own social media accounts.
CodeCanyon has dozens of social media plugins. Learn about the best social media plugins and how to create an online community for your WordPress site.
 WordPress PluginsBest WordPress Social Media Plugins of 2019
 WordPressCreate an Online Community for Your WordPress Site With UserPro
Gallery and Media Plugins
If you want to optimise the media on your site and display galleries or video feeds, a plugin will make everything look more professional. Find out how to find the best gallery plugins for images or video and how to code your own gallery plugin. Or browse the professional gallery and video plugins on CodeCanyon.
 WordPressHow to Find the Best WordPress Gallery Plugins for Images or Video
 WordPressCreate a WordPress Image Gallery: Code the Plugin

Form Plugins
Adding forms to your site lets your visitors get in touch and helps build a relationship. CodeCanyon has plenty of premium form plugins that will make it easy for your visitors to contact you. Learn how to create a form with the bestselling QuForm plugin.
FAQs
Here are the answers to some of the most frequently asked questions about WordPress plugins.
Why can’t I just add the code I need to my theme functions file?
It’s tempting to simply keep on adding code to the functions.php file, and there is some code that should be there.
But if your code is related to functionality in your site, rather than the design or the output of content, then you should code it into a plugin. This means that if you switch themes in the future, you still have that functionality. And you can use the plugin on another site running a different theme.
I’ve added code to my plugin. Why is nothing happening?
This is probably because you haven’t hooked your code to an action or filter hook. Until you do that, nothing will happen.
When I edit my plugin and check my site, I get a white screen. Help!
You’ve probably added some code that’s got an error in it somewhere. PHP is an unforgiving language, and this might be as minor as a semicolon in the wrong place.
Try turning on
WP_DEBUGin your wp-config.php file, and you’ll see a message telling you where the error is. Then you can fix it.When I activate my plugin, I get an error message telling me too many headers have been output. What does this mean?
All this normally means is that there are too many empty lines in your plugin file. Go back and check there are no empty lines at the beginning of the file.
If that doesn’t fix it, try turning on
WP_DEBUG.Where can I find out more about developing plugins?
We have lots of tutorials and courses helping you to build all kinds of plugins here on Envato Tuts+. See if you can find anything that inspires you.

Where can I download plugins for my site?
You can choose from thousands of free plugins in the WordPress plugin directory. You can also buy third-party plugins from CodeCanyon. Always buy plugins from a reputable supplier so you can be sure they follow WordPress coding standards and don’t contain malicious code.
Summary
Plugins will turn your site from a simple blog into a powerful website that includes advanced features and is secure and robust. Try adding plugins to your site today and coding your own to see how you can use plugins to improve your WordPress site.
The Best WordPress Themes and Plugins on Envato Market
Explore thousands of the best WordPress themes ever created on ThemeForest and leading WordPress plugins on CodeCanyon. Purchase these high-quality WordPress themes and plugins and improve your website experience for you and your visitors.

Here are a few of the best-selling and up-and-coming WordPress themes and plugins available for 2020.
 Inspiration23+ Best WordPress Portfolio Themes for Creatives
 WordPress25 Best WordPress Slider & Carousel Plugins of 2021
 WordPress20 Best WordPress Calendar Plugins and Widgets (+5 Free Plugins)
 WordPress Themes31+ Best Responsive WordPress Themes (For Sites in 2021)
 WordPress22 Best WPBakery Page Builder (Visual Composer) Addons and Extensions of 2021
 WordPress Themes30 Best Coaching & Consulting WordPress Themes for 2021

martijn broeders
founder/ strategic creative bij shineyrock web design & consultancy
e-mail: .(JavaScript must be enabled to view this email address)
telefoon: 434 210 0245


Per - categorie
Op - datum
-
December, 2023
-
The Best Small Business Web Designs by DesignRush
/ 2
2 -
October, 2022
-
Create Modern Vue Apps Using Create-Vue and Vite
/ 9 -
September, 2022
-
How to Fix the “There Has Been a Critical Error in Your Website” Error in WordPress
/ 3 -
How To Fix The “There Has Been A Critical Error in Your Website” Error in WordPress
-
August, 2022
-
How to Create a Privacy Policy Page in WordPress
/ 7 -
WordPress Website Maintenance Guide For Beginners
/ 8 -
April, 2022
-
How Long Does It Take to Learn JavaScript?
/ -1
-1 -
How Long Does it Take to Learn JavaScript
/ 1 -
January, 2022
-
The Best Way to Deep Copy an Object in JavaScript
/ -1 -
December, 2021
-
/ 4
-
/ -5
-
Adding and Removing Elements From Arrays in JavaScript
/ -1 -
Create a JavaScript AJAX Post Request: With and Without jQuery
/ 8 -
November, 2021
-
5 Real-Life Uses for the JavaScript reduce() Method
/ -9 -
July, 2021
-
How to Enable or Disable a Button With JavaScript: jQuery vs. Vanilla
/ 4 -
How to Enable or Disable a Button With JavaScript: jQuery vs Vanilla
/ -4 -
Confirm Yes or No With JavaScript
/ -4 -
June, 2021
-
How to Change the URL in JavaScript: Redirecting
/ -1 -
May, 2021
-
27 Best Tab and Accordion Widget Plugins for WordPress (Free & Premium)
/ 13 -
21 Best Tab and Accordion Widget Plugins for WordPress (Free & Premium)
/ -11 -
30 HTML Best Practices for Beginners
/ -7 -
31 Best WordPress Calendar Plugins and Widgets (With 5 Free Plugins)
/ 1 -
25 Ridiculously Impressive HTML5 Canvas Experiments
/ -3 -
/ 1
-
How to Implement Email Verification for New Members
/ 2 -
How to Create a Simple Web-Based Chat Application
/ 6 -
April, 2021
-
30 Popular WordPress User Interface Elements
/ -2 -
Top 18 Best Practices for Writing Super Readable Code
/ 1 -
Best Affiliate WooCommerce Plugins Compared
/ -11 -
March, 2021
-
18 Best WordPress Star Rating Plugins
/ 14 -
10+ Best WordPress Twitter Widgets
/ 2 -
20+ Best WordPress Booking and Reservation Plugins
/ 4 -
February, 2021
-
Working With Tables in React: Part Two
/ -3 -
Best CSS Animations and Effects on CodeCanyon
/ -17 -
30 CSS Best Practices for Beginners
/ 3 -
How to Create a Custom WordPress Plugin From Scratch
/ 2 -
May, 2020
-
10 Best Responsive HTML5 Sliders for Images and Text… and 3 Free Options
/ -6 -
16 Best Tab and Accordion Widget Plugins for WordPress
/ -6 -
April, 2020
-
18 Best WordPress Membership Plugins and 5 Free Plugins
/ 3 -
25 Best WooCommerce Plugins for Products, Pricing, Payments and More
/ 2 -
10 Best WordPress Twitter Widgets
1 / 10 -
March, 2020
-
12 Best Contact Form PHP Scripts for 2020
/ -2 -
September, 2017
-
February, 2020
-
20 Popular WordPress User Interface Elements
/ -4 -
10 Best WordPress Star Rating Plugins
/ -4 -
January, 2020
-
12 Best CSS Animations on CodeCanyon
/ -2 -
12 Best WordPress Booking and Reservation Plugins
/ 1 -
20 Best WordPress Calendar Plugins and Widgets
/ -4 -
December, 2019
-
12 Elegant CSS Pricing Tables for Your Latest Web Project
/ 8 -
24 Best WordPress Form Plugins for 2020
/ -2 -
September, 2019
-
Getting Started With Django: Newly Updated Course
/ -1 -
July, 2019
-
Create a Blog for Each Category or Department in Your WooCommerce Store
/ 3 -
April, 2019
-
8 Best WordPress Booking and Reservation Plugins
/ -15 -
March, 2019
-
Best Exit Popups for WordPress Compared
/ 18 -
Best Exit Popups for WordPress Compared
/ -3 -
11 Best Tab & Accordion WordPress Widgets & Plugins
/ -10 -
12 Best Tab & Accordion WordPress Widgets & Plugins
1 / 1 -
February, 2019
-
New Course: Practical React Fundamentals
/ 2 -
January, 2019
-
Short Course: Better Angular App Architecture With Modules
/ 3 -
Preview Our New Course on Angular Material
/ 3 -
Build Your Own CAPTCHA and Contact Form in PHP
/ -3 -
December, 2018
-
Object-Oriented PHP With Classes and Objects
/ 1 -
Best Practices for ARIA Implementation
/ -5 -
Accessible Apps: Barriers to Access and Getting Started With Accessibility
/ -4 -
November, 2018
-
Dramatically Speed Up Your React Front-End App Using Lazy Loading
/ 17 -
October, 2018
-
15 Best Modern JavaScript Admin Templates for React, Angular, and Vue.js
/ -17 -
15 Best Modern JavaScript Admin Templates for React, Angular and Vue.js
/ 3 -
19 Best JavaScript Admin Templates for React, Angular, and Vue.js
/ 3 -
New Course: Build an App With JavaScript and the MEAN Stack
/ 10 -
Hands-on With ARIA: Accessibility Recipes for Web Apps
/ 6 -
10 Best WordPress Facebook Widgets
13 -
September, 2018
-
Hands-on With ARIA: Accessibility for eCommerce
/ 6 -
New eBooks Available for Subscribers
/ -8 -
Hands-on With ARIA: Homepage Elements and Standard Navigation
/ 11 -
/ -5
-
Site Accessibility: Getting Started With ARIA
/ 5 -
August, 2018
-
How Secure Are Your JavaScript Open-Source Dependencies?
/ -3 -
New Course: Secure Your WordPress Site With SSL
/ -2 -
Testing Components in React Using Jest and Enzyme
/ -8 -
Testing Components in React Using Jest: The Basics
/ -5 -
July, 2018
-
15 Best PHP Event Calendar and Booking Scripts
/ -3 -
June, 2018
-
Create Interactive Gradient Animations Using Granim.js
/ 11 -
How to Build Complex, Large-Scale Vue.js Apps With Vuex
1 / -1 -
Examples of Dependency Injection in PHP With Symfony Components
/ -5 -
May, 2018
-
Set Up Routing in PHP Applications Using the Symfony Routing Component
1 / 8 -
A Beginner’s Guide to Regular Expressions in JavaScript
/ 9 -
Introduction to Popmotion: Custom Animation Scrubber
/ -6 -
Introduction to Popmotion: Pointers and Physics
/ -10 -
New Course: Connect to a Database With Laravel’s Eloquent ORM
/ -6 -
How to Create a Custom Settings Panel in WooCommerce
/ -15 -
Building the DOM faster: speculative parsing, async, defer and preload
1 / 4 -
20 Useful PHP Scripts Available on CodeCanyon
3 / 51 -
April, 2018
-
Introduction to the Stimulus Framework
/ -12 -
Single-Page React Applications With the React-Router and React-Transition-Group Modules
-
/ 7
-
12 Best Contact Form PHP Scripts
1 / -3 -
Getting Started With the Mojs Animation Library: The ShapeSwirl and Stagger Modules
-
Getting Started With the Mojs Animation Library: The Shape Module
/ -1 -
Getting Started With the Mojs Animation Library: The HTML Module
/ 4 -
Project Management Considerations for Your WordPress Project
/ -8 -
8 Things That Make Jest the Best React Testing Framework
/ 6 -
March, 2018
-
Creating an Image Editor Using CamanJS: Layers, Blend Modes, and Events
/ 1 -
New Short Course: Code a Front-End App With GraphQL and React
/ 1 -
Creating an Image Editor Using CamanJS: Applying Basic Filters
/ -12 -
Creating an Image Editor Using CamanJS: Creating Custom Filters and Blend Modes
/ -1 -
Modern Web Scraping With BeautifulSoup and Selenium
/ 1 -
Challenge: Create a To-Do List in React
1 / -2 -
Deploy PHP Web Applications Using Laravel Forge
/ -3 -
Getting Started With the Mojs Animation Library: The Burst Module
/ 4 -
/ -9
-
10 Things Men Can Do to Support Women in Tech
/ -2 -
February, 2018
-
A Gentle Introduction to Higher-Order Components in React: Best Practices
/ -5 -
A Gentle Introduction to HOC in React: Learn by Example
/ 3 -
A Gentle Introduction to Higher-Order Components in React
/ -6 -
Creating Pretty Popup Messages Using SweetAlert2
/ 7 -
Creating Stylish and Responsive Progress Bars Using ProgressBar.js
/ 16 -
18 Best Contact Form PHP Scripts for 2022
/ -2 -
How to Make a Real-Time Sports Application Using Node.js
/ -2 -
Creating a Blogging App Using Angular & MongoDB: Delete Post
/ -17 -
Set Up an OAuth2 Server Using Passport in Laravel
/ 1 -
Creating a Blogging App Using Angular & MongoDB: Edit Post
/ 1 -
Introduction to Mocking in Python
/ 1 -
Creating a Blogging App Using Angular & MongoDB: Show Post
/ 10 -
Creating a Blogging App Using Angular & MongoDB: Home
/ 6 -
/ 3
-
Creating a Blogging App Using Angular & MongoDB: Login
/ 12 -
Creating Your First Angular App: Implement Routing
/ 12 -
Persisted WordPress Admin Notices: Part 4
/ -2 -
Creating Your First Angular App: Components, Part 2
/ 3 -
Persisted WordPress Admin Notices: Part 3
/ 4 -
How Laravel Broadcasting Works
/ -1 -
/ 7
-
Persisted WordPress Admin Notices: Part 2
/ -2 -
Create Your First Angular App: Storing and Accessing Data
/ 6 -
Persisted WordPress Admin Notices: Part 1
/ -1 -
Error and Performance Monitoring for Web & Mobile Apps Using Raygun
/ 6 -
Using Luxon for Date and Time in JavaScript
7 / -3 -
January, 2018
-
How to Create an Audio Oscillator With the Web Audio API
/ -7 -
How to Cache Using Redis in Django Applications
/ 2 -
20 Essential WordPress Utilities to Manage Your Site
/ -6 -
Introduction to API Calls With React and Axios
/ 13 -
Beginner’s Guide to Angular 4: HTTP
/ 13 -
Rapid Web Deployment for Laravel With GitHub, Linode, and RunCloud.io
/ 8 -
Beginners Guide to Angular 4: Routing
/ -10 -
Beginner’s Guide to Angular 4: Services
/ 1 -
Beginner’s Guide to Angular 4: Components
/ 1 -
Creating a Drop-Down Menu for Mobile Pages
/ 9 -
Introduction to Forms in Angular 4: Writing Custom Form Validators
/ 6 -
Getting Started With Redux: Connecting Redux With React
/ 14 -
Getting Started With Redux: Learn by Example
/ 14 -
Getting Started With Redux: Why Redux?
/ 11 -
How to Auto Update WordPress Salts
/ -4 -
How to Download Files in Python
/ -2 -
/ -19
-
Eloquent Mutators and Accessors in Laravel
1 / 15 -
/ -11
-
December, 2017
-
/ 13
-
10 Best HTML5 Sliders for Images and Text
/ 8 -
Site Authentication in Node.js: User Signup
/ -2 -
Creating a Task Manager App Using Ionic: Part 2
/ 2 -
Creating a Task Manager App Using Ionic: Part 1
/ 1 -
Introduction to Forms in Angular 4: Reactive Forms
/ 2 -
/ 4
-
Introduction to Forms in Angular 4: Template-Driven Forms
/ 4 -
24 Essential WordPress Utilities to Manage Your Site
/ -1 -
25 Essential WordPress Utilities to Manage Your Site
/ -10 -
Get Rid of Bugs Quickly Using BugReplay
1 / -16 -
Manipulating HTML5 Canvas Using Konva: Part 1, Getting Started
/ 6 -
10 Must-See Easy Digital Downloads Extensions for Your WordPress Site
/ -2 -
22 Best WordPress Booking and Reservation Plugins
/ -5 -
Understanding ExpressJS Routing
/ -6 -
15 Best WordPress Star Rating Plugins
/ 12 -
Creating Your First Angular App: Basics
/ -1 -
November, 2017
-
Inheritance and Extending Objects With JavaScript
/ -10 -
Introduction to the CSS Grid Layout With Examples
1 / 3 -
/ 5
-
Performant Animations Using KUTE.js: Part 5, Easing Functions and Attributes
/ -6 -
Performant Animations Using KUTE.js: Part 4, Animating Text
/ -10 -
Performant Animations Using KUTE.js: Part 3, Animating SVG
/ -8 -
New Course: Code a Quiz App With Vue.js
/ -2 -
Performant Animations Using KUTE.js: Part 2, Animating CSS Properties
/ 1 -
/ 8
-
Performant Animations Using KUTE.js: Part 1, Getting Started
/ 1 -
10 Best Responsive HTML5 Sliders for Images and Text (Plus 3 Free Options)
/ -3 -
Single-Page Applications With ngRoute and ngAnimate in AngularJS
/ -14 -
Deferring Tasks in Laravel Using Queues
/ -3 -
/ 2
-
Site Authentication in Node.js: User Signup and Login
/ 10 -
Working With Tables in React, Part Two
/ -17 -
Working With Tables in React, Part One
/ 1 -
How to Set Up a Scalable, E-Commerce-Ready WordPress Site Using ClusterCS
/ -2 -
New Course on WordPress Conditional Tags
/ 2 -
October, 2017
-
/ -11
-
Building With Vue.js 2 and Firebase
6 / 11 -
/ -8
-
/ 1
-
Best Unique Bootstrap JavaScript Plugins
/ -6 -
/ -1
-
Essential JavaScript Libraries and Frameworks You Should Know About
/ 6 -
/ 3
-
Vue.js Crash Course: Create a Simple Blog Using Vue.js
/ -14 -
Build a React App With a Laravel RESTful Back End: Part 1, Laravel 5.5 API
/ 2 -
API Authentication With Node.js
/ -4 -
Beginner’s Guide to Angular: HTTP
/ 8 -
Beginner’s Guide to Angular: Routing
/ -4 -
Beginners Guide to Angular: Routing
/ -4 -
Beginner’s Guide to Angular: Services
/ 2 -
Beginner’s Guide to Angular: Components
/ 1 -
September, 2017
-
How to Create a Custom Authentication Guard in Laravel
/ 5 -
Learn Computer Science With JavaScript: Part 3, Loops
/ -3 -
Build Web Applications Using Node.js
/ 1 -
Learn Computer Science With JavaScript: Part 4, Functions
/ 5 -
Learn Computer Science With JavaScript: Part 2, Conditionals
/ 13 -
Create Interactive Charts Using Plotly.js, Part 5: Pie and Gauge Charts
/ -8 -
Create Interactive Charts Using Plotly.js, Part 4: Bubble and Dot Charts
/ 15 -
Create Interactive Charts Using Plotly.js, Part 3: Bar Charts
/ -10 -
Awesome JavaScript Libraries and Frameworks You Should Know About
/ -6 -
Create Interactive Charts Using Plotly.js, Part 2: Line Charts
/ -8 -
Bulk Import a CSV File Into MongoDB Using Mongoose With Node.js
/ -5 -
Build a To-Do API With Node, Express, and MongoDB
/ -8 -
Getting Started With End-to-End Testing in Angular Using Protractor
/ 11 -
TypeScript for Beginners, Part 4: Classes
/ -15 -
Object-Oriented Programming With JavaScript
/ 4 -
10 Best Affiliate WooCommerce Plugins Compared
/ 6 -
Stateful vs. Stateless Functional Components in React
/ 8 -
Make Your JavaScript Code Robust With Flow
/ -2 -
Build a To-Do API With Node and Restify
/ 7 -
Testing Components in Angular Using Jasmine: Part 2, Services
/ 3 -
Testing Components in Angular Using Jasmine: Part 1
/ -1 -
Creating a Blogging App Using React, Part 6: Tags
/ -10 -
August, 2017
-
React Crash Course for Beginners, Part 3
/ 4 -
React Crash Course for Beginners, Part 2
/ 5 -
React Crash Course for Beginners, Part 1
/ 3 -
Set Up a React Environment, Part 4
1 / 9 -
Set Up a React Environment, Part 3
/ -9 -
New Course: Get Started With Phoenix
/ -7 -
Set Up a React Environment, Part 2
/ 2 -
Command Line Basics and Useful Tricks With the Terminal
/ 8 -
How to Create a Real-Time Feed Using Phoenix and React
/ -2 -
Build a React App With a Laravel Back End: Part 2, React
/ 2 -
Build a React App With a Laravel RESTful Back End: Part 1, Laravel 9 API
/ -4 -
Creating a Blogging App Using React, Part 5: Profile Page
/ -2 -
Pagination in CodeIgniter: The Complete Guide
/ 24 -
JavaScript-Based Animations Using Anime.js, Part 4: Callbacks, Easings, and SVG
-
JavaScript-Based Animations Using Anime.js, Part 3: Values, Timeline, and Playback
-
Learn to Code With JavaScript: Part 1, The Basics
/ 4 -
July, 2017
-
10 Elegant CSS Pricing Tables for Your Latest Web Project
/ -9 -
Getting Started With the Flux Architecture in React
/ -2 -
Getting Started With Matter.js: The Composites and Composite Modules
/ 2 -
Getting Started With Matter.js: The Engine and World Modules
/ 14 -
10 More Popular HTML5 Projects for You to Use and Study
/ -21 -
Understand the Basics of Laravel Middleware
/ -1 -
Iterating Fast With Django & Heroku
/ 9 -
Creating a Blogging App Using React, Part 4: Update & Delete Posts
/ 5 -
Creating a jQuery Plugin for Long Shadow Design
/ -12 -
How to Register & Use Laravel Service Providers
2 / -13 -
Unit Testing in React: Shallow vs. Static Testing
/ 4 -
Creating a Blogging App Using React, Part 3: Add & Display Post
/ 14 -
June, 2017
-
Creating a Blogging App Using React, Part 2: User Sign-Up
20 / -4 -
Creating a Blogging App Using React, Part 1: User Sign-In
/ 6 -
9 More Popular HTML5 Projects for You to Use and Study
/ 15 -
Creating a Grocery List Manager Using Angular, Part 2: Managing Items
/ 8 -
9 Elegant CSS Pricing Tables for Your Latest Web Project
/ -3 -
Dynamic Page Templates in WordPress, Part 3
/ -4 -
Angular vs. React: 7 Key Features Compared
/ 6 -
Creating a Grocery List Manager Using Angular, Part 1: Add & Display Items
/ 1 -
New eBooks Available for Subscribers in June 2017
/ 7 -
Create Interactive Charts Using Plotly.js, Part 1: Getting Started
/ 10 -
The 5 Best IDEs for WordPress Development (And Why)
/ -2 -
33 Popular WordPress User Interface Elements
/ 2 -
New Course: How to Hack Your Own App
/ -11 -
How to Install Yii on Windows or a Mac
/ 3 -
What Is a JavaScript Operator?
/ -7 -
How to Register and Use Laravel Service Providers
/ 9
waly Good blog post. I absolutely love this…