
Shineyrock
web design & consultancy
Shineyrock
blog
- dislike -1
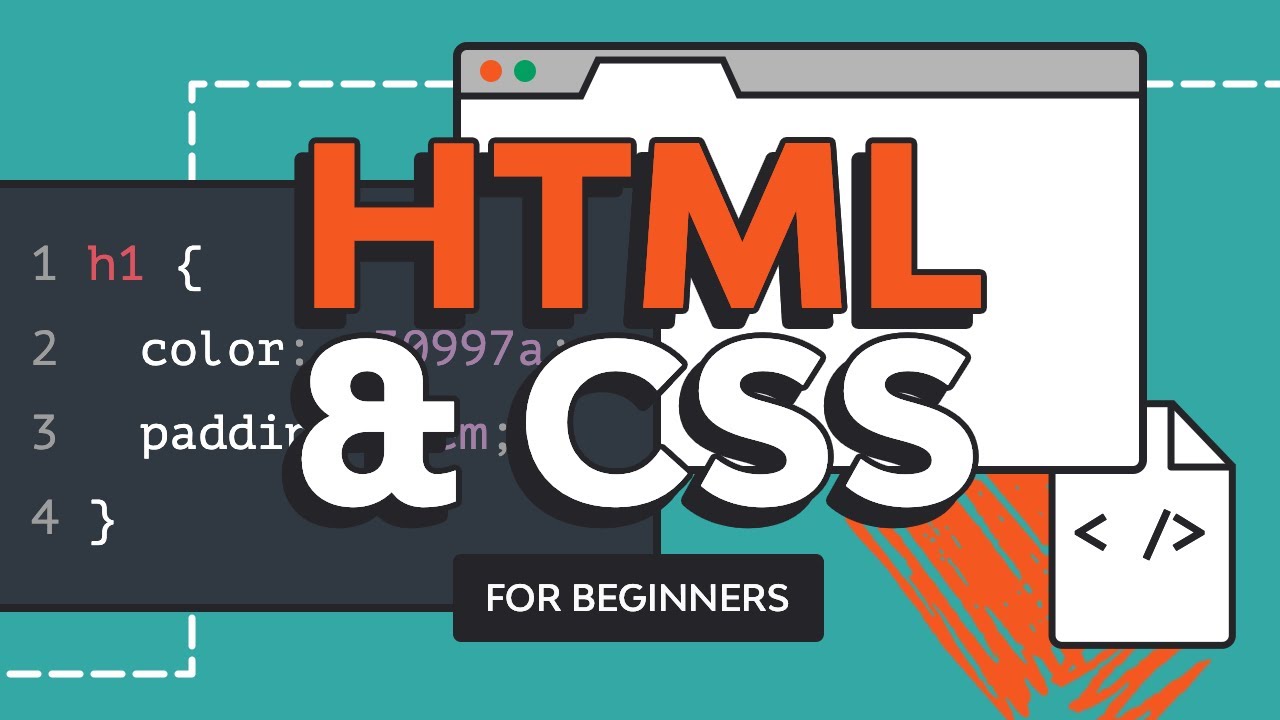
Design and Code Your First Website in 9 Easy-to-Understand Steps
Learning how to begin coding a website can be a tough task. If you’re not familiar with coding languages, it’s even harder. But learning how to code a website is easy with the right guide.
In this tutorial, we’ll go over simple website design for beginners with an HTML web page template. They’re the easiest way to code a website. It’s a process that will save you time in the long run, while letting you create a professionally designed website for your visitors!


Black male in front of computer screen coding mobile app, web development, computer programming (Stock photo from Envato Elements) We’ll be using a template from Envato Elements in this HTML web design code tutorial. If you want to browse other web design template options, look through the Envato Elements collection of HTML website design code templates. You’ll find professional, responsive options that are ready to customize for your next project.
Two Free Web Design and Coding Courses for Beginners
Follow Adi Purdila through these two epic free courses for beginners, as he explains the fundamentals of web design, and HTML & CSS. With these guides you can go from knowing nothing whatsoever, to being able to design and code your own website. Subscribe to the Tuts+ Youtube channel for more!
“How do I pick typefaces, how do I pick colors, what the heck is whitespace, and how do I position and size elements correctly?” These are exactly the kinds of questions which we’ll address in this beginner web design tutorial.
In this free course, you’ll learn how to code with modern HTML web design code and CSS. These are the main building blocks of any website. If you want to become a successful web developer, this is where you need to start!
Before We Start Our Web Design Code
You’re probably excited to learn how to begin coding a website. But looking at HTML website design code can be intimidating if you’re a beginner. So before we dive in, let’s have a look at some useful terms to know so you can understand the changes you’re making in the below steps to code a website.
- HTML: Hypertext Markup Language is a language that organizes web pages. Things like text and links are added here. In this web design code tutorial, we’ll be working with HTML.
-
Tags: Tags are how code works in HTML. They are written between angle brackets. One tag opens (i.e.
<title>) and another closes (i.e.</title>). Text content goes between the opening and closing tags. - PHP: A server-side scripting language that is mostly used to build web-based applications. You’ll see it used to collect data. Almost all contact forms work with a PHP file.
- Comments: Comments are notes left by the writer of the code. These don’t change anything about the page, but they let you see what the code is supposed to do.
What We’ll Need
If you want to follow along with this simple web design code tutorial, you’ll need a couple of things:
- Okno—Ultimate Multipurpose HTML5 Template. We’ll be editing a personal landing page from this HTML web page template.
- Sublime Text editor. Sublime Text is what we’ll use to edit the markup.
- Chrome, Safari, Firefox, or another web browser. You’ll need your browser to make sure your changes work properly.


Do you have everything you need for this website design code tutorial? Then let’s get started!
1. Edit the Title and Header
Okno offers a lot of HTML design codes, but we’re working on the index-onepage-personal.html file in this tutorial. It’s a simple website design code template for beginners to work on. Open it in Sublime Text and your browser after extracting the Okno ZIP folder. Sublime Text will let you edit the sample HTML code for website design, and your browser will let you see the changes in real-time.
In Sublime Text, find the
titletag under the title comment. This changes the name that appears on the tab or window of the page. It will look like this in the simple website HTML code:<!-- Title --> <title>Okno - Ultimate Multi-Purpose HTML5 Template</title>
Replace the text with the name of your site. Since this is a personal one-page website template, this will most likely be your own name. Save the file in Sublime Text, and refresh the page in your browser. You’ll see the changes to the web design code in the tab at the top of the window:


Let’s move on to the navigation bar of this simple website design for beginners. This bar is visible as visitors scroll, and it also includes a spot for a logo on the left. To change the logo, find the
Logocomment and edit these lines of HTML design code:<!-- Logo --> <a class="logo-wrapper" href="index.html"> <img class="logo logo-light" src="assets/img/logo-light.png" alt="Okno"> <img class="logo logo-dark" src="assets/img/logo-dark.png" alt="Okno"> </a>
Both lines are for your logo, but for different parts of your web design code page. The top line is for a light logo against a dark background. The bottom line is for a dark logo against a light background. This is to make sure your branding is visible on the page.
Place copies of your logo in the img folder found inside the assets folder. Change the file names in the website design code (logo-light.png and logo-dark.png) to match the file names of your logo.
Note that the
altattribute is very important for your webpage in case the photo doesn’t load or a visitor is using screen-reading software. Give an alternate description for all your images while working on this simple website HTML code tutorial.In this website design code template, the navigation bar represents different sections of the one-pager. If you don’t want to rename these sections, feel free to skip ahead.
Under the primary menu comment, you’ll see the names of each section. Edit the text between the
atags under thePrimary Menucomment rename the links in your navigation bar.<!-- Primary Menu --> <div class="module menu left"> <ul id="nav-primary" class="nav nav-primary"> <li><a href="#home">Start</a></li> <li><a href="#services">Services</a></li> <li><a href="#skills">Skills</a></li> <li><a href="#experience">Experience</a></li> <li><a href="#testimonials">Testimonials</a></li> <li><a href="#works">Works</a></li> <li><a href="#contact">Contact</a></li> </ul> </div>
Save the simple website HTML code for this web design project and refresh to see your changes.
2. Update Your Personal Information
Now it’s time to start editing your information in the web design code.
Let’s look at the section starting with the
Section / Homecomment. What can be changed here? We can replace the background image and avatar. You’ll also be able to add your name, job title, area of expertise, and other information.


Let’s start by changing the images. You can edit the background photo from the bg-image
divand the avatar from theimgtag within the container v-centerdiv. Unlike altering text, you’ll need to make changes to theimgtag itself through the source attribute. Thesrcattribute tells the webpage where the photo can be found.If we look at the
srcattribute for the background photo, we can see where to find the image. In your Finder or File Explorer, head to assets > img > photos to find the image file yourself.To change the background image in your simple website HTML code, have a replacement JPG ready with the exact dimensions of the original file. Give your photo a simple name and place it in the photos folder. Now change the name in the
srcattribute, and save.If you don’t have a replacement photo ready but want to change the background, head to Envato Elements. You can find a stock photo or cool graphic to use. For this simple website design for beginners tutorial, I’ll be using one of these stock background photos.


Changing the avatar is the same process. Drop your headshot in the avatar folder within the img folder. Replace avatar01 with the name of your photo. Save the simple website HTML code for this web design project in Sublime Text and refresh your browser to see how it looks now.


Change the Name and Bio
Editing your name and bio takes a few simple steps. Find the
H1tag within the col-md-9div, and add your name. On the line below, type in your job title.<h1 class="mt-20 mb-0 text-lg">Mike Lee</h1> <h3 class="lead text-muted mb-40">Professional Front-End Developer</h3>
There are three Description Lists under the
Section / Homecomment. They’re defined by thedltag. They are where you can briefly add more professional information. As you can see in your browser, the default fields are Specialty, Born Date, Previous Company, Years Experience, and Current Company. If you want to share this information, edit theddtags within eachdl. If you’d like to change this entire section, you’ll need to change thedttags within eachdltag.<div class="col-sm-4"> <dl class="description-2"> <dt>Speciality</dt> <dd>Front-End Development</dd> <dt>Years experience</dt> <dd>6+</dd> </dl> </div>
Made your changes? Save the simple website design HTML code file, refresh the page, and see your changes.


Notice that you can have visitors download your CV or resume by clicking a button. To set this up, we’ll first create a folder titled cv within the assets folder. Then, we’ll put our CV in this new folder.
Now let’s look at the HTML and figure out how to make this work. Head to the Download CV line in the sample HTML code for website design:
<div class="col-sm-4"><a href="#" class="btn btn-primary btn-filled btn-block">Download CV</a></div>
We are going to replace the # in the
hrefattribute with assets/cv/name-of-cv-file.extension. To make the CV downloadable, add thedownloadattribute after thehrefattribute. The line in your sample HTML code for website design should now look like this:<div class="col-sm-4"><a href="assets/cv/my-resume.docx" download class="btn btn-primary btn-filled btn-block">Download CV</a></div>
Save the HTML code for this web design project and test it out in your browser. Note that for now you’ll only be able to open the file from the button. But once your website goes live, visitors will be able to download your resume.
3. Services Section
Let’s add the services we offer to our sample HTML code for website design. If you changed the name of this section, or any other sections, in Step 1, you can still follow along with the rest of the tutorial. Just make sure to change the
h6tag in each step.Change the name of the first service with the Mobile Apps
h5tag. This can be any service you offer. On the following line, give a brief description of your service in theptag. Save the website design code file and see the changes in your browser.


Looks like we might run into a problem. If you changed the name of the service, the mobile app icon no longer matches up. That’s not a problem. Okno uses Themify Icons. These are free web icons for personal and commercial use.
Search for a matching icon from the Themify link above. Add the name of the icon’s attribute in the
itag. For this example, I will use theti-shortcodeicon. Let’s see how that looks now:


That’s better. Repeat this process for the rest of your services to edit the Desktop Apps, Graphic Design, HTML/CSS Development, and AngularJS lines of the sample HTML code for website design.


4. Add Your Skills
This is a well-designed section in this simple website design for beginners. As you can see in your browser, the skills section has a meter to show your proficiency. This can be edited in the web design code under the Skills comment.
You can change the skills that you want visitors to see. The names of these skills are found in the
strongtag under theSection / Skillscomment.How good are you at performing this skill? To show this off on your site, we need to backtrack to the progress-bar
div. Within thedivtag, we are going to edit thearia-valuenowattribute, as well as thestyleattribute. These values will use the same number to represent your skill level out of 100. If you’d like to put 97 out of 100, make that change in both attributes. Your changes should match the code below.<div class="mb-40"> <div class="progress progress-2"> <div class="progress-bar" role="progressbar" aria-valuenow="97" aria-valuemin="0" aria-valuemax="100" style="width: 97%;">97%</div> </div> <strong>Adobe Photoshop</strong> </div>
Save and refresh your browser window to see your new skills! You can repeat this step to finish the rest of your skills section in your web design code.


5. Education and Job Experience
This is the section in our web design code that lets us add education and job experience.
We’ll edit the three tags within the event class
div. The first line lets us edit the date, the following line is for the title of your education or work experience, and the final line is for the location. So if I wanted to share my three-month rocket science course at NASA, I’d edit the code to look like this:<div class="event"> <div class="date">15.02.2004 - 15.05.2004</div> <h5 class="mb-0">Rocket Science Course</h5> <span class="text-muted">NASA</span> </div>
You can repeat these steps for the other two event class
divtags.


6. Testimonials
If you’re following these steps to code a website as a freelancer, then you know how important this section is. Testimonials from past customers, clients, and bosses go a long way towards persuading someone to trust you with their next project.
This section starts under the
Section / Testimonialscomment. These quotes have special formatting that we’re going to leave as they are. All we’re going to do is edit the text found in thedivtag. If you have an exact quote you want to use, add it here. Use thestrongtag to make parts of the testimonial stand out with bold text.If you have a headshot of the person giving the testimonial, add it to the
imgtags in this Testimonial section. If not, feel free to remove that line of code. The following two lines of code let you finish the testimonial with the person’s name and job title.<div class="col-sm-6"> <div class="testimonial testimonial-1"> <div class="quote"> These tutorials are <strong>excellent</strong>. I’ve learned so much. I can’t wait to try more! </div> <div class="author with-image"> <img src="assets/img/avatars/avatar01.jpg" alt="testimonial author avatar"> <span class="name text-uppercase">Mark Johnson</span> <span class="caption text-muted">Envato Tuts+ user</span> </div> </div> </div>
Repeat these steps in your sample HTML code for website design to finish this section.


7. Media
Do you have photos of your work that you’d like to share? You can have them ready for your simple website HTML code in this step.
Before we get started, it’s important to note that getting the exact dimensions of your photos is important for this section. Each photo must be exactly 640x563. Use Adobe Photoshop to resize your images. If you don’t have the program, you can use a free website like Pixlr or Photopea.
Once you have your pictures ready, let’s see how we can add them to our website. Find the
Section / Workscomment, then theimgtags under theMedia Itemcomments. We can change our photo with a familiar line of code. If we read this line, we can see that we need to have our photos within the works folder, which is found in the img folder. We’ll also need to change the file name so our website knows which photo to use.<img src="assets/img/works/gr-winter.jpg" alt="grand rapids in winter">
Let’s make these changes and save. Refresh your browser to see your photo.


You may notice that hovering over your photo shows a special effect. It looks as if we can leave a brief description of the project shown in the picture. Let’s take full advantage of this HTML web page template and add a brief description.
Backtrack to the
h5tags under the Media Item comments of the sample HTML code for website design. On the first line, let’s leave the name of this project. In the second line, let’s add a related service that was needed to finish the project.<div class="image-box image-hover bg-black text-center"> <div class="image"> <div class="hover dark"> <a href="#"> <h5 class="mb-0">Cityscapes</h5> <span class="text-muted">Photography</span> </a> </div> <img src="assets/img/works/gr-winter.jpg" alt="grand rapids in winter"> </div> </div>
If this work is available to see online, we can link to it. In the
atag under theMedia Itemcomment, replace the # in thehrefattribute with the link to the webpage featuring your project. Try linking to Google to see how this works.This section lets you share up to six projects. Follow the steps above for each piece of work you’d like to share.


8. Contact Section
Now is the time to set up the contact information in the HTML code for this web design project. This is an easy step to get done in your web design code.
We start by adding your headshot in the
imgtag under theSection / Contentcomment. This follows the same process that we talked about in the second step of this web design code tutorial.Within the
addresstag under theSection / Contentcomment, we’ll add our address, phone number, and email address. Feel free to change the type of contact information you share by editing what’s within thestrongtags.<div class="col-sm-4"> <img class="img-circle mb-25" width="72" src="assets/img/avatars/envato-avatar.jpg" alt="envato avatar"> <address> <strong>Address:</strong><br> A795 Folsom Ave, Suite 600<br> San Francisco, CA 94107<br><br> <strong>Phone:</strong><br> +48 221 909 99<br><br> <strong>E-mail:</strong><br> <a href="#">your.name@example.com</a><br> </address> </div>
The contact form doesn’t need many changes. If you’d like to add a fun spin to the default text, just change the
placeholderattributes found within theformtag. You can change the text of the button with thebuttontag.<div class="col-sm-8"> <form class="contact-form validate-form" id="contact-form"> <div class="row"> <div class="form-group col-sm-6"> <input name="name" id="name" type="text" class="form-control bordered" placeholder="Name"> </div> <div class="form-group col-sm-6"> <input name="email" id="email" type="text" class="form-control bordered" placeholder="E-mail address"> </div> </div> <div class="form-group"> <textarea name="message" id="message" cols="30" rows="7" class="form-control bordered" placeholder="Message"></textarea> </div> <div class="row"> <div class="col-md-4 col-sm-6"> <button class="btn btn-filled btn-primary btn-block">Send it <i class="i-after ti-arrow-right"></i></button> </div>
But will our contact form work? Not yet! We need to make a very quick edit to our PHP file. In your Finder or File Explorer, go to assets > php within the Okno folder. Then open the contact-form.php file in Sublime Text.
In this file, you’ll see the following line of code:
$emailTo = ’example@mail.com’;
Replace the example email with your own email address, and save the web design code file. Now, when a visitor completes the contact form, you will get an email telling you what they said.


9. Edit the Footer
This is the last of our steps to code a website. The footer of this one-page website features a copyright credit to the creators of the Okno web template and three links. You can remove the footer entirely, remove some elements, or edit the links. If you want to edit the links, I’ll walk you through how to do that.


Under the
Footercomment of the sample HTML code for website design, you’ll find the following list item:<li><a href="#">Sign Up</a></li>
Within the
hrefattribute, replace the # symbol with a link to a website you want to share. This change will let visitors go to that website by clicking on Sign Up. You can change this text to anything you’d like. Repeat this process for the next two list items.We’re Done!
Congrats, you successfully followed the steps to code a website with a web template! This process saves you a lot of time if you’re creating a site for yourself or a client. And as you can see, it’s one of the easiest ways to build a website.
Find Awesome HTML Web Page Templates From Envato Elements
If you liked the web template we used in this tutorial, you can find even more variety on Envato Elements. There are a ton of modern choices for you, and you’ll be able to edit them just as easily as Okno. Here are just a few options you could try that are found on Envato Elements.
1. Aster: Creative Portfolio & Agency HTML Template


If you don’t know too much coding for web design, Aster will still let you create a stunning website. This HTML template is a great example of web design coding. It is made for digital portfolios and creative agencies. There are more than five home page samples to choose from, as well as over 17 inner pages. The code is clean and commented, making Aster one of the easiest ways to code a website.
2. AppStorm: App Startup Template


Learning coding for web design? Here’s the perfect HTML web page template for a tech startup. AppStorm is designed with promoting software in mind. The layout is incredibly modern and functional, as well as being made for mobile. Choose from three different home page designs and customization options for the perfect look. AppStorm is the easiest way to code a website for your new app or SaaS product.
3. Jadusona: eCommerce Baby Shop Bootstrap4 Template


Jadusona is a minimal, easy-to-use e-commerce website. You’ll have a variety of page demos to use to show off your baby and child products. Get your online baby shop ready thanks to Jadusona’s features, like:
- fully responsive design
- clean code
- included Google Fonts
- Ajax contact form
Try Jadusona if you’ve been looking for web design examples for beginners. This is a good web design coding example to start your website.
4. Erika: Portfolio, CV and Resume HTML Template


martijn broeders
founder/ strategic creative at shineyrock web design & consultancy
e-mail: 104@shineyrock.com
phone: 434 210 0245


By - category
- 1
- 2
- 3
- 4
- 7
By - date
December, 2023
The Best Small Business Web Designs by DesignRush
/ 1
1October, 2022
Create Modern Vue Apps Using Create-Vue and Vite
/ 3September, 2022
Pros and Cons of Using WordPress
/ -2
-2How to Fix the “There Has Been a Critical Error in Your Website” Error in WordPress
/ 1How To Fix The “There Has Been A Critical Error in Your Website” Error in WordPress
/ -4August, 2022
How to Create a Privacy Policy Page in WordPress
/ -2April, 2022
How Long Does It Take to Learn JavaScript?
/ 1January, 2022
The Best Way to Deep Copy an Object in JavaScript
/ 1December, 2021
-
/ 4
-
/ -3
Adding and Removing Elements From Arrays in JavaScript
/ 3Create a JavaScript AJAX Post Request: With and Without jQuery
/ 4November, 2021
5 Real-Life Uses for the JavaScript reduce() Method
/ -4July, 2021
How to Enable or Disable a Button With JavaScript: jQuery vs. Vanilla
/ 8How to Enable or Disable a Button With JavaScript: jQuery vs Vanilla
/ -6Confirm Yes or No With JavaScript
/ -1June, 2021
How to Change the URL in JavaScript: Redirecting
/ -415+ Best WordPress Twitter Widgets
/ -2May, 2021
27 Best Tab and Accordion Widget Plugins for WordPress (Free & Premium)
/ 1121 Best Tab and Accordion Widget Plugins for WordPress (Free & Premium)
/ -430 HTML Best Practices for Beginners
/ -731 Best WordPress Calendar Plugins and Widgets (With 5 Free Plugins)
/ -525 Ridiculously Impressive HTML5 Canvas Experiments
/ -2-
/ 5
How to Implement Email Verification for New Members
/ 2How to Create a Simple Web-Based Chat Application
/ 2April, 2021
30 Popular WordPress User Interface Elements
/ -1Top 18 Best Practices for Writing Super Readable Code
/ 3Best Affiliate WooCommerce Plugins Compared
/ -9March, 2021
18 Best WordPress Star Rating Plugins
/ 810+ Best WordPress Twitter Widgets
/ -320+ Best WordPress Booking and Reservation Plugins
/ 1February, 2021
Working With Tables in React: Part Two
/ -4Best CSS Animations and Effects on CodeCanyon
/ -1530 CSS Best Practices for Beginners
/ -3How to Create a Custom WordPress Plugin From Scratch
/ -2May, 2020
10 Best Responsive HTML5 Sliders for Images and Text… and 3 Free Options
/ -316 Best Tab and Accordion Widget Plugins for WordPress
/ -2April, 2020
18 Best WordPress Membership Plugins and 5 Free Plugins
/ -125 Best WooCommerce Plugins for Products, Pricing, Payments and More
/ 110 Best WordPress Twitter Widgets
1 / 7March, 2020
12 Best Contact Form PHP Scripts for 2020
/ -5September, 2017
February, 2020
20 Popular WordPress User Interface Elements
/ -210 Best WordPress Star Rating Plugins
/ -7January, 2020
12 Best CSS Animations on CodeCanyon
/ -312 Best WordPress Booking and Reservation Plugins
/ -1December, 2019
12 Elegant CSS Pricing Tables for Your Latest Web Project
/ 624 Best WordPress Form Plugins for 2020
/ 3September, 2019
14 Best PHP Event Calendar and Booking Scripts
/ -6July, 2019
Create a Blog for Each Category or Department in Your WooCommerce Store
/ 7April, 2019
8 Best WordPress Booking and Reservation Plugins
/ -6March, 2019
Best Exit Popups for WordPress Compared
/ 16Best Exit Popups for WordPress Compared
/ -711 Best Tab & Accordion WordPress Widgets & Plugins
/ -912 Best Tab & Accordion WordPress Widgets & Plugins
1 / -2-

harriett What's up, after reading this awesome…
-
February, 2019
New Course: Practical React Fundamentals
/ 2January, 2019
Preview Our New Course on Angular Material
/ 2Build Your Own CAPTCHA and Contact Form in PHP
/ -2December, 2018
Object-Oriented PHP With Classes and Objects
/ -7Best Practices for ARIA Implementation
/ -1Accessible Apps: Barriers to Access and Getting Started With Accessibility
/ -6November, 2018
Dramatically Speed Up Your React Front-End App Using Lazy Loading
/ 17October, 2018
15 Best Modern JavaScript Admin Templates for React, Angular, and Vue.js
/ -515 Best Modern JavaScript Admin Templates for React, Angular and Vue.js
/ 319 Best JavaScript Admin Templates for React, Angular, and Vue.js
/ 2New Course: Build an App With JavaScript and the MEAN Stack
/ 2Hands-on With ARIA: Accessibility Recipes for Web Apps
/ -110 Best WordPress Facebook Widgets
13 / -1-
Cathleen Wonderful, what a website it is! This…
-
Sharyn Ѕimply a smiling ѵisitant heгe to…
-
shelby What's up it's me, I am also visiting…
-
Lottie I read this paragraph completely…
-
September, 2018
Hands-on With ARIA: Accessibility for eCommerce
/ -2New eBooks Available for Subscribers
/ -3Hands-on With ARIA: Homepage Elements and Standard Navigation
/ 12-
/ -4
Site Accessibility: Getting Started With ARIA
/ 1August, 2018
How Secure Are Your JavaScript Open-Source Dependencies?
/ -2New Course: Secure Your WordPress Site With SSL
/ -3Testing Components in React Using Jest and Enzyme
/ -9Testing Components in React Using Jest: The Basics
/ -5July, 2018
15 Best PHP Event Calendar and Booking Scripts
/ 3June, 2018
Create Interactive Gradient Animations Using Granim.js
/ 13How to Build Complex, Large-Scale Vue.js Apps With Vuex
1 / -9-
Frankenicerm Get exactly what you want with custom…
-
Examples of Dependency Injection in PHP With Symfony Components
/ -2May, 2018
Set Up Routing in PHP Applications Using the Symfony Routing Component
1 / 13-
romeo You certainly deserve a round of…
-
A Beginner’s Guide to Regular Expressions in JavaScript
/ 7Introduction to Popmotion: Custom Animation Scrubber
/ -7Introduction to Popmotion: Pointers and Physics
/ -16New Course: Connect to a Database With Laravel’s Eloquent ORM
/ -13How to Create a Custom Settings Panel in WooCommerce
/ -10Building the DOM faster: speculative parsing, async, defer and preload
1 / 2-
Melissa Perfect info, thanks!
-
20 Useful PHP Scripts Available on CodeCanyon
3 / 42-
darios Valuable info. Lucky me I found your…
-
Vern Link exchhange is nothing else excelt…
-
Patsy Bryan Wow, that's what I was seeking for,…
-
April, 2018
How to Find and Fix Poor Page Load Times With Raygun
/ 2Introduction to the Stimulus Framework
/ -7Single-Page React Applications With the React-Router and React-Transition-Group Modules
-
/ 2
12 Best Contact Form PHP Scripts
1 / 2-
tammie I am sure this piece of writing has…
-
Getting Started With the Mojs Animation Library: The ShapeSwirl and Stagger Modules
/ 4Getting Started With the Mojs Animation Library: The Shape Module
/ 1Getting Started With the Mojs Animation Library: The HTML Module
/ 2Project Management Considerations for Your WordPress Project
/ -58 Things That Make Jest the Best React Testing Framework
/ 4March, 2018
Creating an Image Editor Using CamanJS: Layers, Blend Modes, and Events
/ -1New Short Course: Code a Front-End App With GraphQL and React
/ 5Creating an Image Editor Using CamanJS: Applying Basic Filters
/ -4Creating an Image Editor Using CamanJS: Creating Custom Filters and Blend Modes
/ -4Modern Web Scraping With BeautifulSoup and Selenium
/ 3Challenge: Create a To-Do List in React
1 / 1-
mezo Post wrting іs allso a excitement, іf…
-
Deploy PHP Web Applications Using Laravel Forge
/ -1Getting Started With the Mojs Animation Library: The Burst Module
/ -3-
/ -9
10 Things Men Can Do to Support Women in Tech
/ 2February, 2018
A Gentle Introduction to Higher-Order Components in React: Best Practices
/ -5Challenge: Build a React Component
/ 2A Gentle Introduction to HOC in React: Learn by Example
/ 3A Gentle Introduction to Higher-Order Components in React
/ -7Creating Pretty Popup Messages Using SweetAlert2
/ -6Creating Stylish and Responsive Progress Bars Using ProgressBar.js
/ 8How to Make a Real-Time Sports Application Using Node.js
/ -2Creating a Blogging App Using Angular & MongoDB: Delete Post
/ -12Set Up an OAuth2 Server Using Passport in Laravel
/ 6Creating a Blogging App Using Angular & MongoDB: Edit Post
/ -5Creating a Blogging App Using Angular & MongoDB: Add Post
/ 3Introduction to Mocking in Python
/ -1Creating a Blogging App Using Angular & MongoDB: Show Post
/ 5Creating a Blogging App Using Angular & MongoDB: Home
/ 7-
/ 3
Creating a Blogging App Using Angular & MongoDB: Login
/ 11Creating Your First Angular App: Implement Routing
/ 4Persisted WordPress Admin Notices: Part 4
/ -7Creating Your First Angular App: Components, Part 2
/ -2Persisted WordPress Admin Notices: Part 3
/ 3Creating Your First Angular App: Components, Part 1
/ 1How Laravel Broadcasting Works
/ 7-
/ 8
Persisted WordPress Admin Notices: Part 2
/ -4Create Your First Angular App: Storing and Accessing Data
/ 3Persisted WordPress Admin Notices: Part 1
/ -4Error and Performance Monitoring for Web & Mobile Apps Using Raygun
/ 1Using Luxon for Date and Time in JavaScript
7 / -7-
earlene This text is invaluable. How can I find…
-
amelie I needed to thank you for this great…
-
noe vance Hi, for all time i used to check…
-
brayden Pretty! This was an extremely wonderful…
-
January, 2018
How to Create an Audio Oscillator With the Web Audio API
/ -8How to Cache Using Redis in Django Applications
/ 320 Essential WordPress Utilities to Manage Your Site
/ -8Introduction to API Calls With React and Axios
/ -1Beginner’s Guide to Angular 4: HTTP
/ 14Rapid Web Deployment for Laravel With GitHub, Linode, and RunCloud.io
/ 7Beginners Guide to Angular 4: Routing
/ -7Beginner’s Guide to Angular 4: Services
/ -1Beginner’s Guide to Angular 4: Components
/ -1Creating a Drop-Down Menu for Mobile Pages
/ 6Introduction to Forms in Angular 4: Writing Custom Form Validators
/ 610 Best WordPress Booking & Reservation Plugins
/ -2Getting Started With Redux: Connecting Redux With React
/ 7Getting Started With Redux: Learn by Example
/ 12Getting Started With Redux: Why Redux?
/ 5Understanding Recursion With JavaScript
/ -2How to Auto Update WordPress Salts
/ -6How to Download Files in Python
/ 6-
/ -15
Eloquent Mutators and Accessors in Laravel
1 / 12-
mezo Ι love it whenever people get…
-
-
/ -10
December, 2017
-
/ 17
10 Best HTML5 Sliders for Images and Text
/ 6Site Authentication in Node.js: User Signup
/ -1Creating a Task Manager App Using Ionic: Part 2
/ -1Creating a Task Manager App Using Ionic: Part 1
/ -2Introduction to Forms in Angular 4: Reactive Forms
/ 1-
/ -2
Introduction to Forms in Angular 4: Template-Driven Forms
/ 224 Essential WordPress Utilities to Manage Your Site
/ 325 Essential WordPress Utilities to Manage Your Site
/ -5Get Rid of Bugs Quickly Using BugReplay
1 / -18-
madison I see you don't monetize your site,…
-
Manipulating HTML5 Canvas Using Konva: Part 1, Getting Started
/ 410 Must-See Easy Digital Downloads Extensions for Your WordPress Site
/ -122 Best WordPress Booking and Reservation Plugins
/ -2Understanding ExpressJS Routing
/ -415 Best WordPress Star Rating Plugins
/ 3Creating Your First Angular App: Basics
/ -6November, 2017
Inheritance and Extending Objects With JavaScript
/ -8Introduction to the CSS Grid Layout With Examples
1-
quito Hello. And Bye.
-
-
/ 4
Performant Animations Using KUTE.js: Part 5, Easing Functions and Attributes
Performant Animations Using KUTE.js: Part 4, Animating Text
/ -6Performant Animations Using KUTE.js: Part 3, Animating SVG
/ -6New Course: Code a Quiz App With Vue.js
/ 1Performant Animations Using KUTE.js: Part 2, Animating CSS Properties
-
/ -1
Performant Animations Using KUTE.js: Part 1, Getting Started
/ 310 Best Responsive HTML5 Sliders for Images and Text (Plus 3 Free Options)
/ -7Single-Page Applications With ngRoute and ngAnimate in AngularJS
/ -11Deferring Tasks in Laravel Using Queues
/ -5Site Authentication in Node.js: User Signup and Login
/ 4Working With Tables in React, Part Two
/ -14Working With Tables in React, Part One
/ 5How to Set Up a Scalable, E-Commerce-Ready WordPress Site Using ClusterCS
/ -5New Course on WordPress Conditional Tags
/ 6October, 2017
TypeScript for Beginners, Part 5: Generics
/ -2-
/ -10
Building With Vue.js 2 and Firebase
6 / 13-
Peden Hello! I'm at work browsing your blog…
-
cameron Very great post. I just stumbled upon…
-
juliane mckibben WOW just what I was looking for. Came…
-
carissa That is a good tip especially to those…
-
-
/ -12
-
/ 1
Best Unique Bootstrap JavaScript Plugins
/ 2Essential JavaScript Libraries and Frameworks You Should Know About
/ 4-
/ 3
Vue.js Crash Course: Create a Simple Blog Using Vue.js
/ -15Build a React App With a Laravel RESTful Back End: Part 1, Laravel 5.5 API
/ 5API Authentication With Node.js
/ -6Beginner’s Guide to Angular: Routing
/ -4Beginners Guide to Angular: Routing
/ -8Beginner’s Guide to Angular: Services
/ 3Beginner’s Guide to Angular: Components
/ 2September, 2017
How to Create a Custom Authentication Guard in Laravel
/ 3Learn Computer Science With JavaScript: Part 3, Loops
/ -8Build Web Applications Using Node.js
/ 1Learn Computer Science With JavaScript: Part 4, Functions
/ 2Learn Computer Science With JavaScript: Part 2, Conditionals
/ 13Create Interactive Charts Using Plotly.js, Part 5: Pie and Gauge Charts
/ -4Create Interactive Charts Using Plotly.js, Part 4: Bubble and Dot Charts
Create Interactive Charts Using Plotly.js, Part 3: Bar Charts
/ -8Awesome JavaScript Libraries and Frameworks You Should Know About
/ -2Create Interactive Charts Using Plotly.js, Part 2: Line Charts
/ -12Bulk Import a CSV File Into MongoDB Using Mongoose With Node.js
/ -4Build a To-Do API With Node, Express, and MongoDB
/ 3Getting Started With End-to-End Testing in Angular Using Protractor
/ 6TypeScript for Beginners, Part 4: Classes
/ -5Object-Oriented Programming With JavaScript
/ 610 Best Affiliate WooCommerce Plugins Compared
/ -3Stateful vs. Stateless Functional Components in React
/ 11Make Your JavaScript Code Robust With Flow
/ -3Build a To-Do API With Node and Restify
/ 8Testing Components in Angular Using Jasmine: Part 2, Services
/ 1Testing Components in Angular Using Jasmine: Part 1
/ -4Creating a Blogging App Using React, Part 6: Tags
/ -12August, 2017
React Crash Course for Beginners, Part 3
/ 5React Crash Course for Beginners, Part 2
/ 3React Crash Course for Beginners, Part 1
/ 6Set Up a React Environment, Part 4
1 / 10-
abrazil Hello, I check your blog like every…
-
Set Up a React Environment, Part 3
/ -1New Course: Get Started With Phoenix
/ -2Set Up a React Environment, Part 2
/ 2Set Up a React Environment, Part 1
/ -4Command Line Basics and Useful Tricks With the Terminal
/ 6How to Create a Real-Time Feed Using Phoenix and React
/ -3Build a React App With a Laravel Back End: Part 2, React
/ -4Build a React App With a Laravel RESTful Back End: Part 1, Laravel 9 API
/ -4Creating a Blogging App Using React, Part 5: Profile Page
/ -4Pagination in CodeIgniter: The Complete Guide
/ 23JavaScript-Based Animations Using Anime.js, Part 4: Callbacks, Easings, and SVG
/ -3JavaScript-Based Animations Using Anime.js, Part 3: Values, Timeline, and Playback
/ 1Learn to Code With JavaScript: Part 1, The Basics
/ -3July, 2017
10 Elegant CSS Pricing Tables for Your Latest Web Project
/ -12Getting Started With the Flux Architecture in React
/ -3Getting Started With Matter.js: The Composites and Composite Modules
Getting Started With Matter.js: The Engine and World Modules
/ 1410 More Popular HTML5 Projects for You to Use and Study
/ -17Understand the Basics of Laravel Middleware
/ -2Iterating Fast With Django & Heroku
/ 12Creating a Blogging App Using React, Part 4: Update & Delete Posts
/ -3Creating a jQuery Plugin for Long Shadow Design
/ -9How to Register & Use Laravel Service Providers
2 / -7-
alexandria Hi, its fastidious article on the topic…
-
soi keo I always spent my half an hour to read…
-
Unit Testing in React: Shallow vs. Static Testing
/ 1Creating a Blogging App Using React, Part 3: Add & Display Post
/ 8June, 2017
Creating a Blogging App Using React, Part 2: User Sign-Up
20 / -1-
carris This piece of writing presents clear…
-
marissa Great write-up, I am normal visitor of…
-
ena As a Newbie, I am always exploring…
-
beth Thank you for another fantastic post.…
-
Creating a Blogging App Using React, Part 1: User Sign-In
/ -3Creating a Grocery List Manager Using Angular, Part 2: Managing Items
/ 49 Elegant CSS Pricing Tables for Your Latest Web Project
/ -3Dynamic Page Templates in WordPress, Part 3
/ -1Angular vs. React: 7 Key Features Compared
/ 6Creating a Grocery List Manager Using Angular, Part 1: Add & Display Items
New eBooks Available for Subscribers in June 2017
/ 2Create Interactive Charts Using Plotly.js, Part 1: Getting Started
/ 6The 5 Best IDEs for WordPress Development (And Why)
/ -333 Popular WordPress User Interface Elements
/ -4New Course: How to Hack Your Own App
/ -9How to Install Yii on Windows or a Mac
/ -3What Is a JavaScript Operator?
/ -3How to Register and Use Laravel Service Providers
/ 3
- 1
- 2
- 3
- 4
- 7
waly Good blog post. I absolutely love this…